1.数据准备
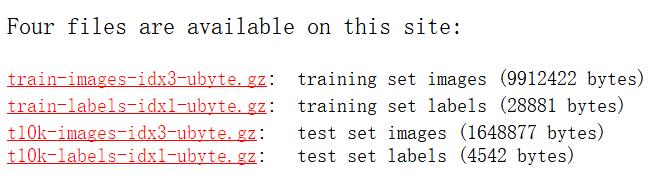
基于MNIST数据集实现手写字识别可谓是深度学习经典入门必会的技能,该数据集由60000张训练图片和10000张测试图片组成,每张均为28*28像素的黑白图片。关于数据集的获取,大家可以直接登录到官网下载图1中4个压缩文件,这里需要注意的是,下载后的数据集为二进制的,不需要解压。
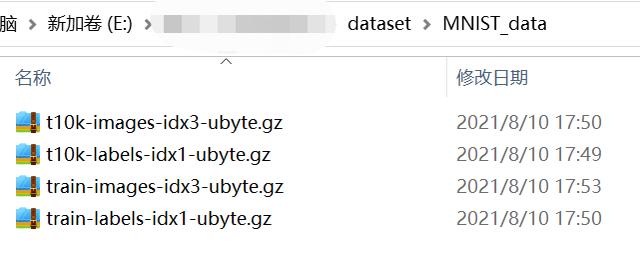
下载之后可以放入任意文件夹
CNN网络的训练代码如下,通过运行代码,自动地完成训练数据集的下载,任意文件夹下。自动保存训练模型,将模型保存在./ckpt_dir文件夹下。自动在上次训练的基础上进行模型的训练。脚本默认训练10000次
在PyCharm中新建mnist文件夹,在该文件夹下面有ckpt_dir用来保存模型,train.py是训练代码,test.py测试代码,test_images文件夹下面是测试数字图片

train.py
,注意数据集路径mnist_path = "E:/xx/dataset/MNIST_data"
# -*- coding: utf-8 -*-
import tensorflow as tf
import tensorflow.examples.tutorials.mnist.input_data as input_data
import os
import sys
mnist_path = "E:/xx/dataset/MNIST_data"
mnist = input_data.read_data_sets(mnist_path, one_hot=True)
x = tf.placeholder("float", shape=)
y_ = tf.placeholder("float", shape=)
W = tf.Variable(tf.zeros())
b = tf.Variable(tf.zeros())
def weight_variable(shape):
initial = tf.truncated_normal(shape, stddev=0.1)
return tf.Variable(initial)
def bias_variable(shape):
initial = tf.constant(0.1, shape=shape)
return tf.Variable(initial)
#权重初始化
def conv2d(x, W):
return tf.nn.conv2d(x, W, strides=, padding='SAME')
def max_pool_2x2(x):
return tf.nn.max_pool(x, ksize=,
strides=, padding='SAME')
#第一层卷积
W_conv1 = weight_variable()
b_conv1 = bias_variable()
x_image = tf.reshape(x, )
h_conv1 = tf.nn.relu(conv2d(x_image, W_conv1) + b_conv1)
h_pool1 = max_pool_2x2(h_conv1)
#d第二层卷积
W_conv2 = weight_variable()
b_conv2 = bias_variable()
h_conv2 = tf.nn.relu(conv2d(h_pool1, W_conv2) + b_conv2)
h_pool2 = max_pool_2x2(h_conv2)
#全连接层
W_fc1 = weight_variable()
b_fc1 = bias_variable()
h_pool2_flat = tf.reshape(h_pool2, )
h_fc1 = tf.nn.relu(tf.matmul(h_pool2_flat, W_fc1) + b_fc1)
keep_prob = tf.placeholder("float")
h_fc1_drop = tf.nn.dropout(h_fc1, keep_prob)
#输出层
W_fc2 = weight_variable()
b_fc2 = bias_variable()
#训练和评估模型
y_conv=tf.nn.softmax(tf.matmul(h_fc1_drop, W_fc2) + b_fc2)
cross_entropy = -tf.reduce_sum(y_*tf.log(y_conv))
train_step = tf.train.AdagradOptimizer(1e-4).minimize(cross_entropy)
correct_prediction = tf.equal(tf.argmax(y_conv,1), tf.argmax(y_,1))
accuracy = tf.reduce_mean(tf.cast(correct_prediction, "float"))
ckpt_dir = "./ckpt_dir"
if not os.path.exists(ckpt_dir):
os.makedirs(ckpt_dir)
#标志变量不参与到训练中
global_step = tf.Variable(0, name='global_step', trainable=False)
saver = tf.train.Saver()
if sys.argv.__len__()>1 and int(sys.argv)>0:
end=int(sys.argv)
else:
end=10000
with tf.Session() as sess:
ckpt = tf.train.get_checkpoint_state(ckpt_dir)
if ckpt and ckpt.model_checkpoint_path:
print(ckpt.model_checkpoint_path)
saver.restore(sess, ckpt.model_checkpoint_path) # restore all variables
else:
tf.global_variables_initializer().run()
start = global_step.eval() # get last global_step
print("Start from:", start)
for i in range(start, end):
batch = mnist.train.next_batch(100)
if i%10 == 0:
train_accuracy = accuracy.eval(session=sess,feed_dict={
x:batch, y_: batch, keep_prob: 1.0})
print ("step %d, training accuracy %g"%(i, train_accuracy))
train_step.run(session=sess,feed_dict={x: batch, y_: batch, keep_prob: 0.5})
global_step.assign(i).eval() #i更新global_step.
saver.save(sess, ckpt_dir + "/model.ckpt", global_step=global_step)
print ("test accuracy %g"%accuracy.eval(session=sess,feed_dict={
x: mnist.test.images, y_: mnist.test.labels, keep_prob: 1.0}))3.模型测试
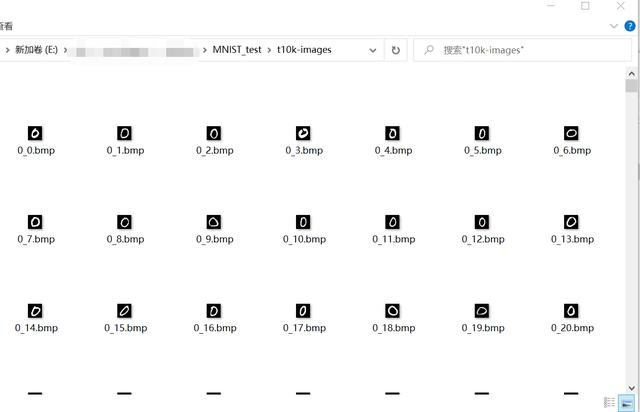
在第三步中完成了对模型的训练,本步骤中,将对训练的模型进行效果测试,通过传入一张手写的数字图像,输出结果为模型对传入图像的识别结果,测试图片可以手写再通过cv2转换,本次测试图片test_images下我只放了7张图片

完整的测试集有10000张图片
test.py
# coding=utf-8
import glob
import tensorflow as tf
import os
import numpy as np
import sys
from PIL import Image#pillow(PIL)
x = tf.placeholder("float", shape=)
y_ = tf.placeholder("float", shape=)
W = tf.Variable(tf.zeros())
b = tf.Variable(tf.zeros())
def weight_variable(shape):
initial = tf.truncated_normal(shape, stddev=0.1)
return tf.Variable(initial)
def bias_variable(shape):
initial = tf.constant(0.1, shape=shape)
return tf.Variable(initial)
#权重初始化
def conv2d(x, W):
return tf.nn.conv2d(x, W, strides=, padding='SAME')
def max_pool_2x2(x):
return tf.nn.max_pool(x, ksize=,
strides=, padding='SAME')
#第一层卷积
W_conv1 = weight_variable()
b_conv1 = bias_variable()
x_image = tf.reshape(x, )
h_conv1 = tf.nn.relu(conv2d(x_image, W_conv1) + b_conv1)
h_pool1 = max_pool_2x2(h_conv1)
#d第二层卷积
W_conv2 = weight_variable()
b_conv2 = bias_variable()
h_conv2 = tf.nn.relu(conv2d(h_pool1, W_conv2) + b_conv2)
h_pool2 = max_pool_2x2(h_conv2)
#全连接层
W_fc1 = weight_variable()
b_fc1 = bias_variable()
h_pool2_flat = tf.reshape(h_pool2, )
h_fc1 = tf.nn.relu(tf.matmul(h_pool2_flat, W_fc1) + b_fc1)
keep_prob = tf.placeholder("float")
h_fc1_drop = tf.nn.dropout(h_fc1, keep_prob)
#输出层
W_fc2 = weight_variable()
b_fc2 = bias_variable()
#训练和评估模型
y_conv=tf.nn.softmax(tf.matmul(h_fc1_drop, W_fc2) + b_fc2)
ckpt_dir = "./ckpt_dir"
saver = tf.train.Saver()
with tf.Session() as sess:
ckpt = tf.train.get_checkpoint_state(ckpt_dir)
if ckpt and ckpt.model_checkpoint_path:
print(ckpt.model_checkpoint_path)
saver.restore(sess, ckpt.model_checkpoint_path) # restore all variables
else:
raise FileNotFoundError("未找到模型")#raise 引发异常
# image_path="./test_images/0_0.bmp"
# # image_path="/home/mnist/mnist03/test_data/"+sys.argv+".png"
# #image_path=sys.argv
# print(image_path)
# img = Image.open(image_path).convert('L')#灰度图(L)
# img_shape = np.reshape(img, 784)
# real_x = np.array()# 0-255 uint8 8位无符号整数,取值: 如果采用1-大数变成小数
# y = sess.run(y_conv, feed_dict={x: real_x,keep_prob: 1.0}) #y类似一个二维表,因为只有一张图片所以只有一行,y包含10个值,
#
# print('Predict digit', np.argmax(y))#找出最大的值
# 测试集图片
images_dir = 'test_images'
images_path = glob.glob(images_dir + "/*")
for image_path in images_path:
img = Image.open(image_path).convert('L')#灰度图(L)
img_shape = np.reshape(img, 784)
real_x = np.array()# 0-255 uint8 8位无符号整数,取值: 如果采用1-大数变成小数
y = sess.run(y_conv, feed_dict={x: real_x,keep_prob: 1.0}) #y类似一个二维表,因为只有一张图片所以只有一行,y包含10个值,
print('imagePath:{},Predict digit:{}'.format(image_path, np.argmax(y)))#找出最大的值
输出的结果:
./ckpt_dirmodel.ckpt-9999
imagePath:test_images0_0.bmp,Predict digit:0
imagePath:test_images1_0.bmp,Predict digit:3
imagePath:test_images2_0.bmp,Predict digit:2
imagePath:test_images3_0.bmp,Predict digit:8
imagePath:test_images4_0.bmp,Predict digit:4
imagePath:test_images5_0.bmp,Predict digit:5
imagePath:test_images6_0.bmp,Predict digit:6
因为我只训练了10000次,从上面接口看出1和3还是不准确,大家可以加大训练次数,比如20000次